Go to your
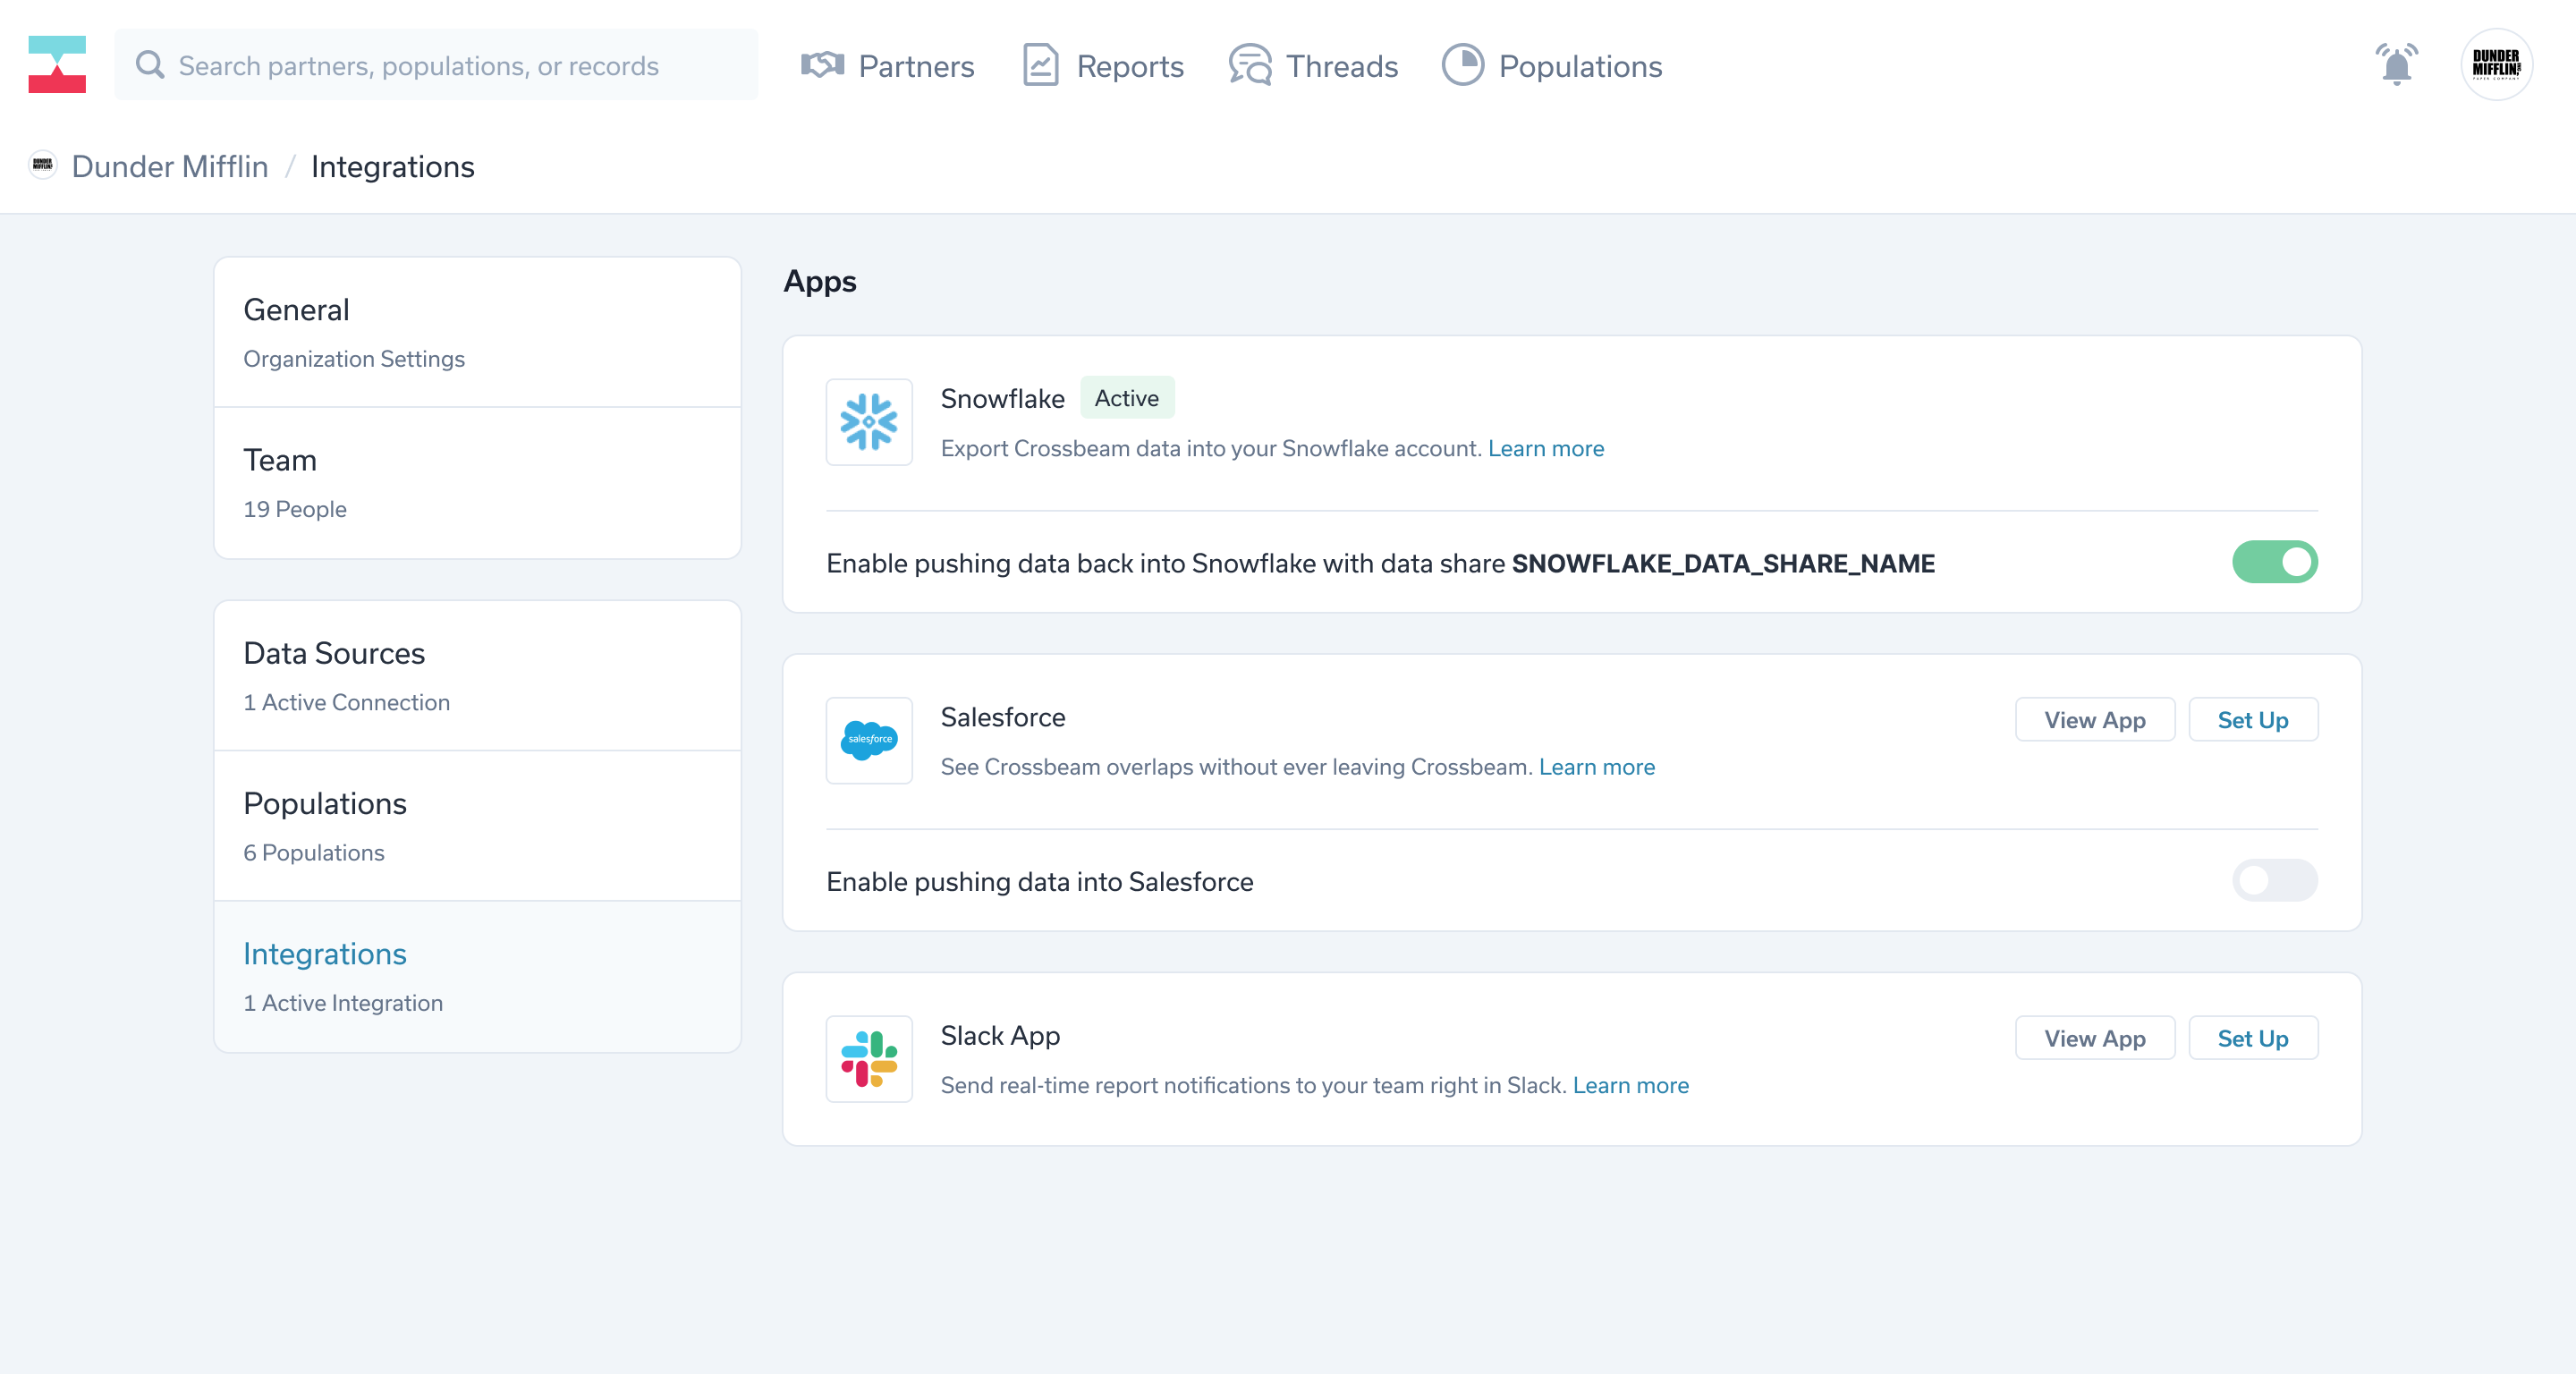
integrations page and you'll see a tile for Snowflake and a toggle along the bottom to "Enable pushing data back into Snowflake".
Note: if you don't see an option to enable the Snowflake push, you may not have it included in your plan. Contact your CSM, sales rep, or [email protected] for help.
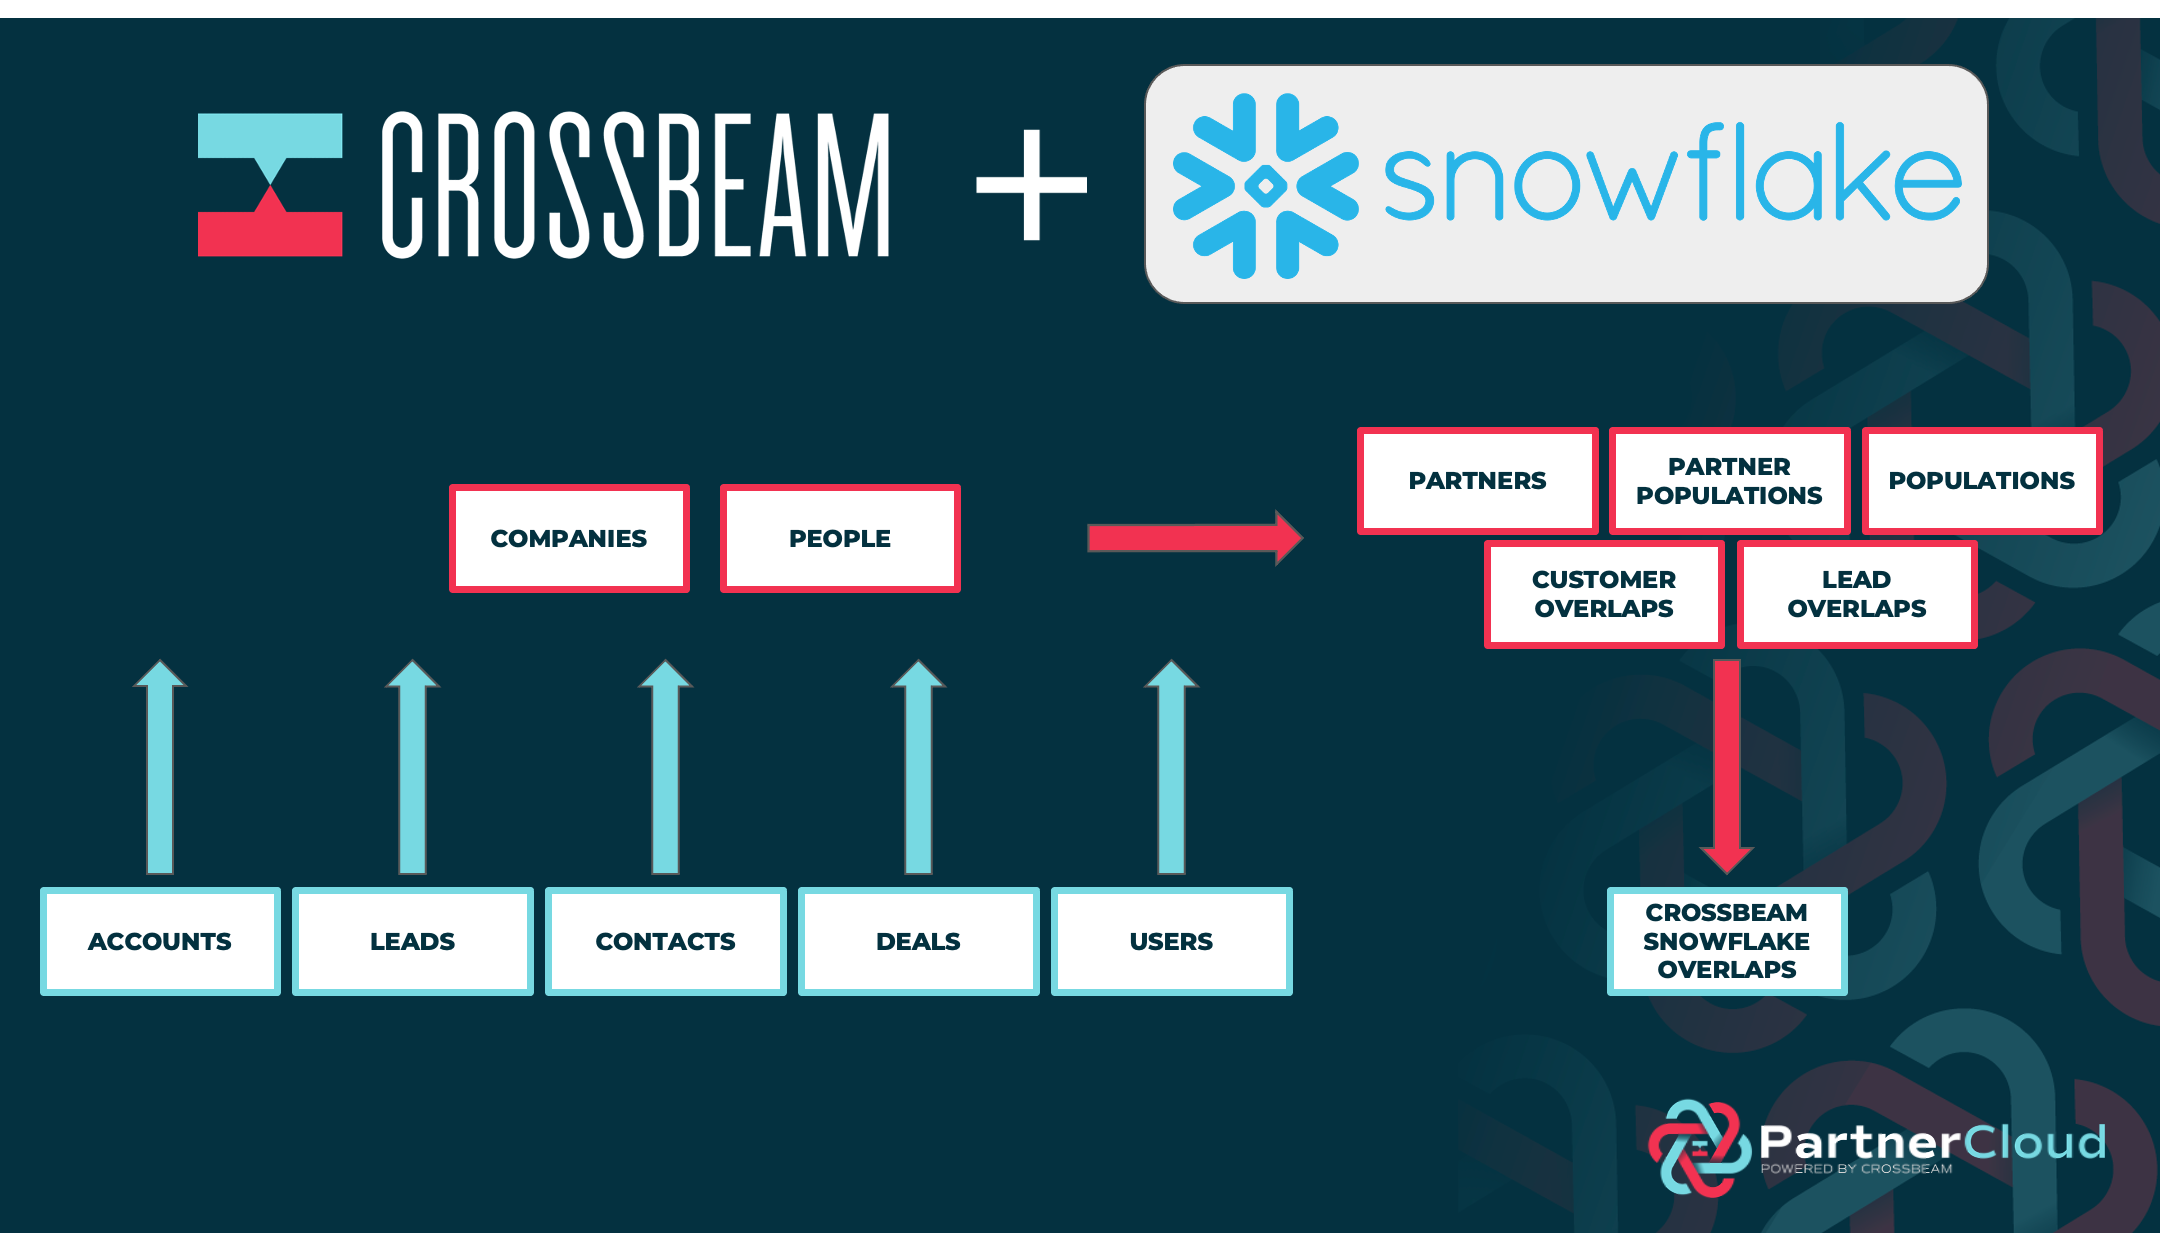
When snowflake push is enabled, all population overlaps (across all partners) will be pushed to your Snowflake account via a secure Data Share in Snowflake.
Before enabling the push, you must go to your
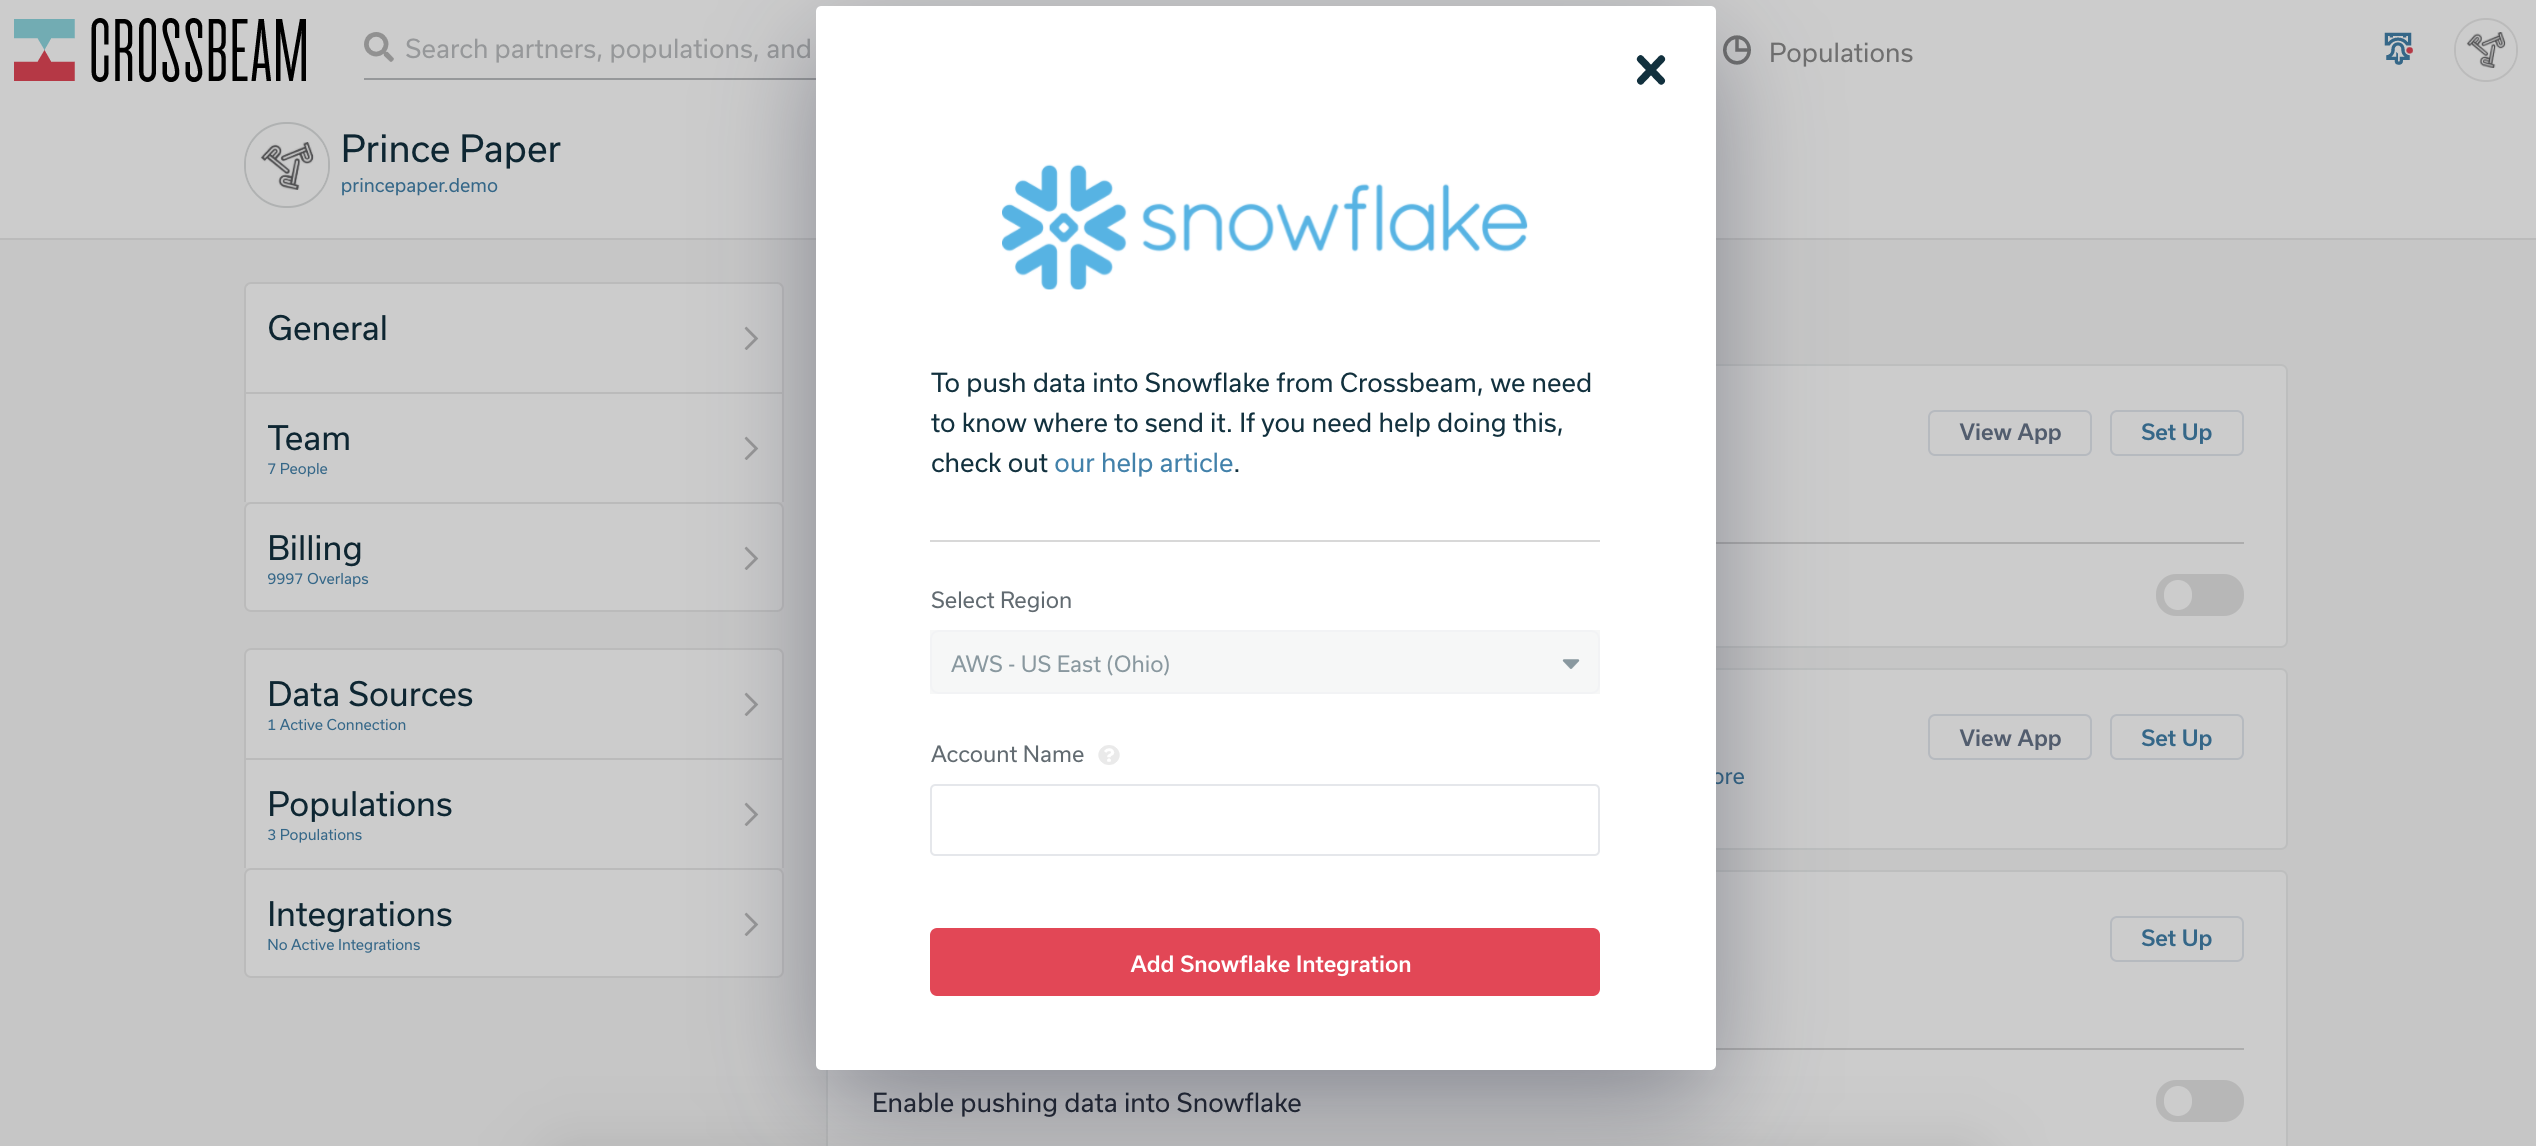
integrations page and click "Set Up" next to Snowflake.
We'll need two things:
1. Your Snowflake account region. Currently we support four regions:
- US West (Oregon): this region is the only one not included in snowflake URLs
- US East (Ohio)
- US East (N. Virginia)
- EU West (Ireland)
Please let us know if your account is in a different region and we can work to add support for you.
2. Your Snowflake account name. Account name can be found in the url of your Snowflake instance: https://<account_name>.<region>.snowflakecomputing.com.
Next, flip on the toggle for "Enable pushing data into Snowflake".
You're all set! Now, you will receive an incoming data share in Snowflake.
You will receive an incoming data share in Snowflake called CROSSBEAM_OVERLAPS_<ORG-ID>_<RAND-IDENTIFIER>
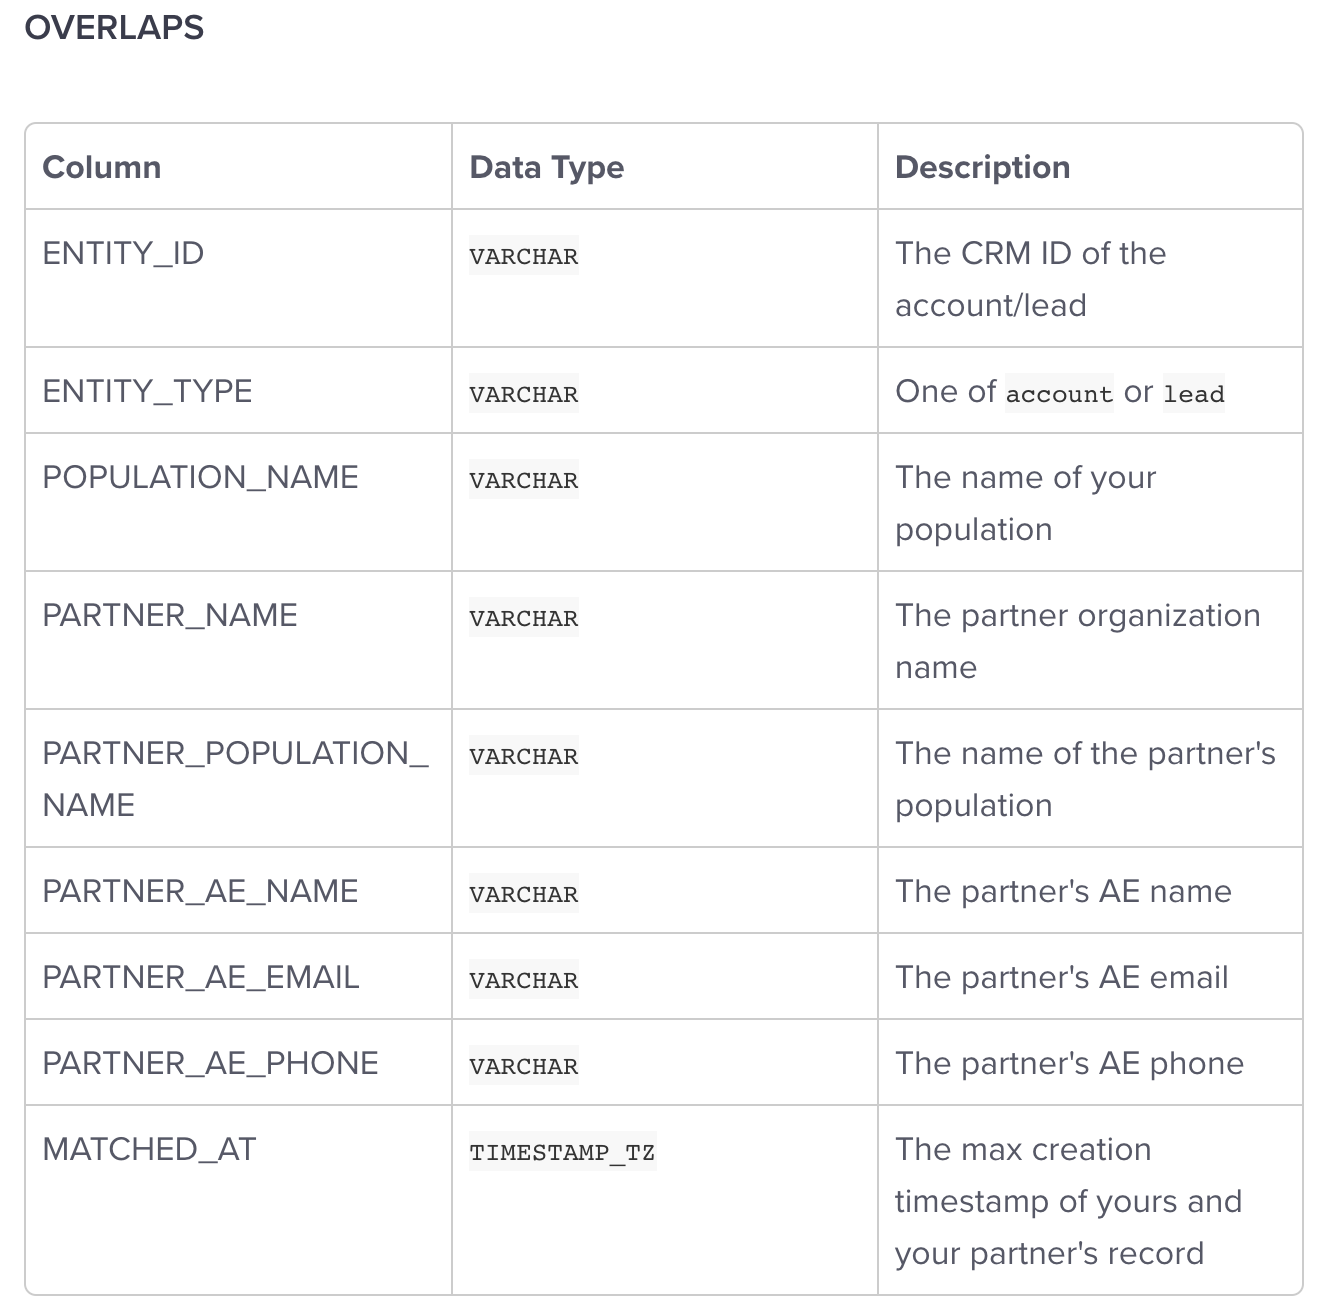
When the data share is mounted you will see a CROSSBEAM schema with an OVERLAPS view, defined in the attached table below.


